Bathroom remodels might not sound as exciting as kitchen remodels.
In fact, they often get put off so long that a full bathroom remodel becomes necessary – and that can get expensive. However, the good news is we have a few easy 1 day bathroom improvement projects for you!
Best of all, they’re pretty cheap too!
We’re not talking major expenses like switching your built-in bathtub to a freestanding one (though if you want to go that route, no one’s going to stop you).
1. Grab a Can of Paint

While this is a pretty easy bathroom improvement project, painting your bathroom is also rather time consuming. However, if you start early enough in the day, you should have it completed by evening.
Naturally, you’ll want to use a paint that can handle the higher levels of moisture and humidity bathrooms are subject to.
The only downside is these sometimes require a second coating, which will end up adding another day to the project. However, many are made with single coat application in mind.
Pretty much the only hard part will be finding a suitable paint in the color you desire. The beauty of it is you can choose any color to create the mood and aesthetic of your choice.
You can also make the project go a lot quicker if you decide to only do one wall as an accent!
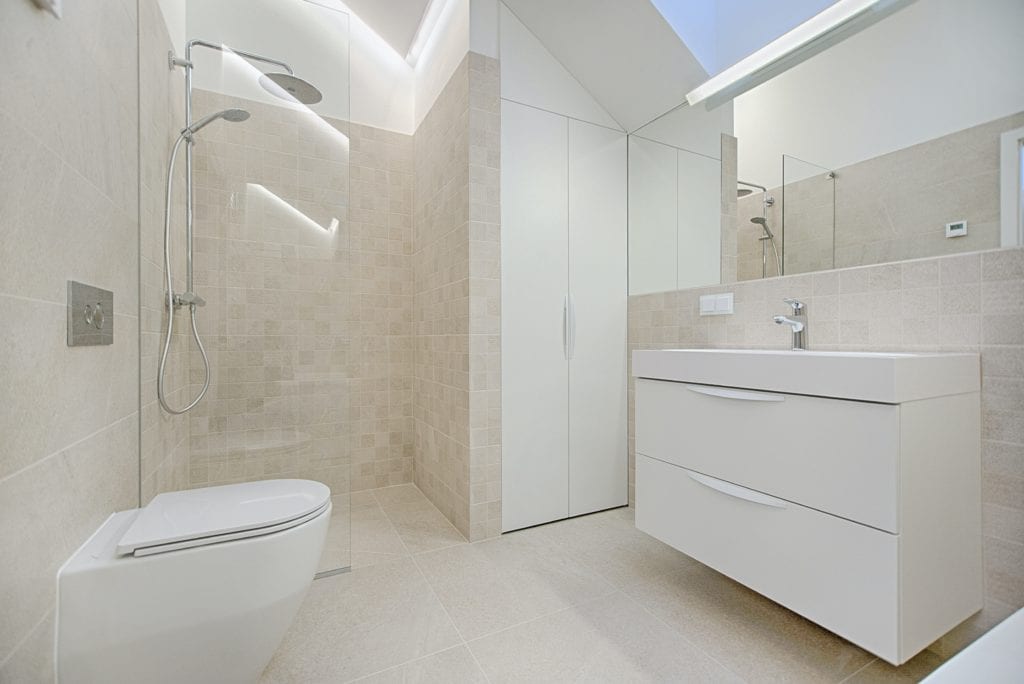
2. Add a Backsplash
Many bathrooms take the tiles all the way up to the ceiling. Others only raise the tiles as high as they need to be in areas such as the shower or behind the bath.
If your bathroom has a mix of tiled and painted walls, you might consider adding a backsplash to areas that sometimes get overlooked – like above the sink. Or perhaps all you need to do is replace the existing backsplash to create an accent detail!
Either way, this is a great opportunity to breathe new life into your bathroom.
As an added bonus, using tiles already the right size eliminates the need for tools like a tile cutter. Pretty much all you’ll need is:
- tile of choice
- tile grout
- tile adhesive
- tile trowel and rubber float
- tile spacers (unless your tiles already have a mesh backing)
- grout sponge
- grout haze remover
If you want to go the extra mile, you might even frame the backsplash with wood trim. This can look especially fantastic if you’re also replacing the mirror, as you can fit it along with your backsplash within the same trim.
3. Decorative Mirrors
Speaking of mirrors, it’s actually very easy to make one yourself and build or include a frame of your choosing.
One especially beautiful design choice is to transform a wood-framed window.
Obviously, you’ll want a freestanding frame – if you do this with an installed window, you’re losing your source of natural light, which is already at a premium in most bathrooms.
All you need to do is get cut-to-size mirrors to replace the glass. If you want to style the frame to give it a rustic look (or even add a pop of color), we recommend doing so first!
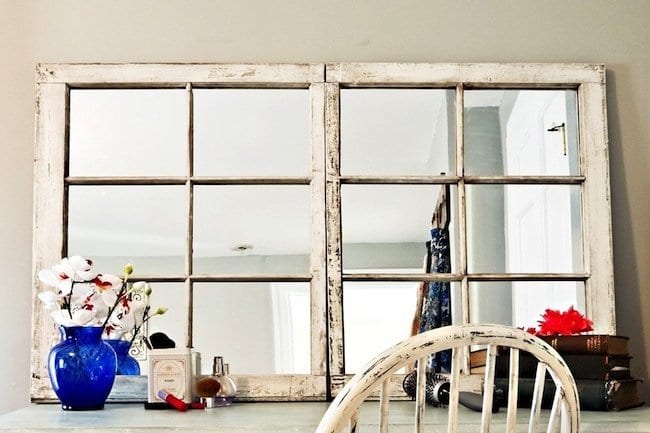
Another option is to leave the glass panes in and use something like Krylon Looking Glass Paint. This allows you to transform the glass into a mirror while skipping the time-consuming process of removing the panes and installing the cut-to-size mirrors.
Once it’s done, all that’s left is to put your new statement mirror up!
4. Add a Touch of Brass
I know what you’re thinking… brass, in the 21st century?
Believe it or not, brass is enjoying a well-deserved renaissance right now and is one of the particularly popular emerging bathroom trends for the 2021s.
However, there’s a trick to doing it the right way.
If your bathroom is very light, with lots of white shades and stainless steel, keep the brass to a minimum. For example, use a brass light fixture or bathroom cabinet handles and leave everything else as is.
If you’re incorporating lots of darker colors, such as black accent walls, you can flip that combination on its head by using mostly brass and keeping the stainless steel fixtures as accent pieces.
5. Update Your Faucets (and Maybe Your Showerhead)
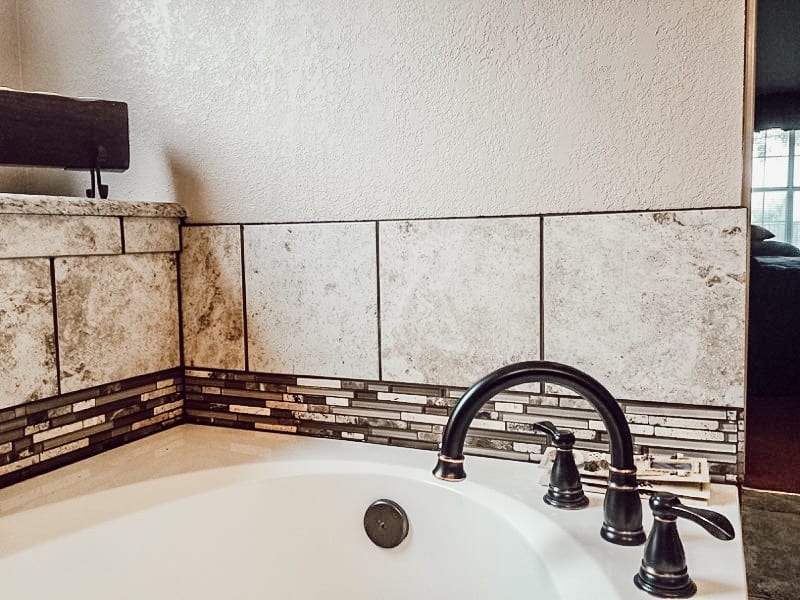
Two very common fixtures to consider changing – whether as a design choice, for easier cleaning, or because the current ones are either leaky or otherwise resource-intensive – are your bathroom faucets and showerhead.
You don’t need to update both at the same time, of course. These can be two separate 1 day bathroom improvement projects, especially if you very rarely have a full day for DIY.
The good news is it’s pretty easy, so long as you have the right tools and are willing to spend some time studying the instructions before tackling either project.
You should also bear in mind different brands and even styles can also have different installation steps and requirements. If in doubt, you can always contact the manufacturers for advice!
Never forget to start by taking a look at the current fixture (this is especially important for faucets) to make sure you buy one with the same number of connections.
Ready to get started?
Here’s a set of easy guides on how to replace a bathroom faucet and how to replace a shower head.
Conclusion

There are certainly bigger projects that, depending on your handyman skills, might only take a day to complete as well. However, for this guide, we wanted to make sure anyone – even complete beginners – can find truly easy 1 day bathroom improvement projects to try out!
Worried it might not be enough to save your bathroom?
Check out our guide on the Undeniable Proof Your Bathroom Needs Remodeling to see how big of a project your bathroom really is.
Contact us today and get started!