
A shed or outbuilding can solve a real space problem: crowded garage storage, a lack of room for tools, a dedicated hobby area, protected equipment storage, or a place to work away from the house. But a detached structure is more than a building kit or a spot in the backyard. Its usefulness depends on decisions made before construction begins.
This outbuilding planning checklist will help you turn a general idea into a clear project scope. Work through it before choosing a building size, ordering materials, or scheduling site work. A little planning up front can prevent an outbuilding that is difficult to reach, undersized from the start, poorly suited to the ground, or more complicated than expected.
Start With the Purpose of the Outbuilding
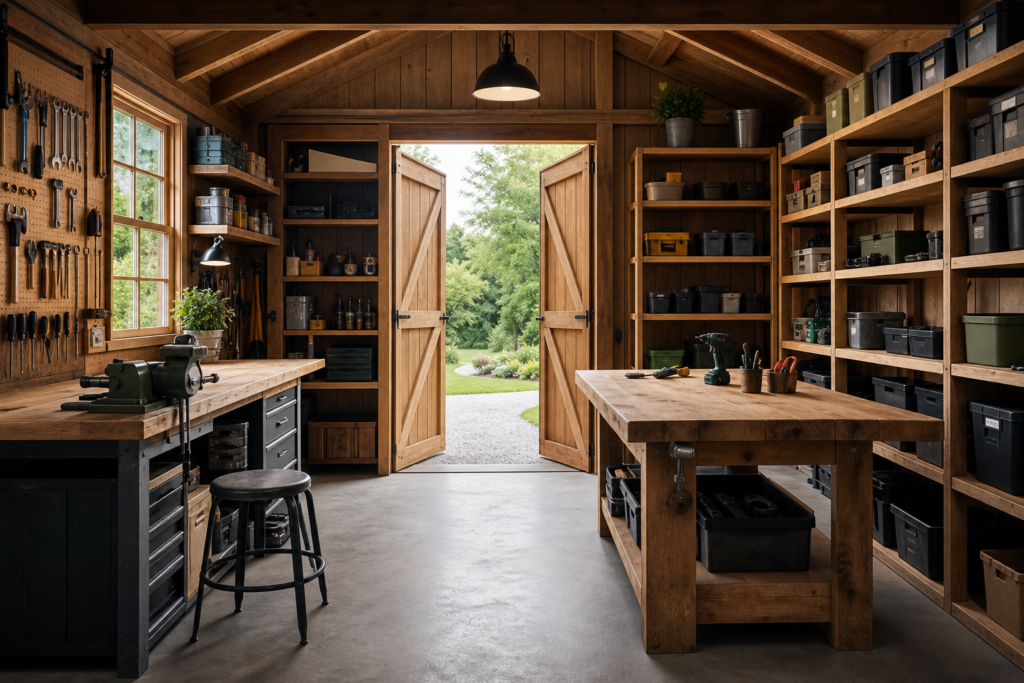
Begin with the question that affects every other decision: what must this structure do? “Storage” is a start, but it is not specific enough to determine the right footprint, door type, foundation, lighting, or layout.
Write down the primary use and any secondary uses. Then list the largest items that will go inside, how frequently you will access them, and whether the space needs to be comfortable for people or simply dry and secure for equipment.
Garden and yard storage: Mowers, trimmers, hand tools, potting supplies, and seasonal equipment may call for wide doors, durable flooring, wall storage, and convenient access from the yard.
Workshop: Benches, stationary tools, materials, and task lighting require more room than basic storage. Electrical capacity, ventilation, door clearance, and a level work surface become more important.
Vehicle, ATV, or equipment storage: Measure the equipment, including mirrors, trailer tongues, open doors, and turning space. Consider whether a vehicle needs to enter straight on or back in.
Hobby, studio, or office use: Think beyond square footage. Comfort may require insulation, daylight, electrical service, heating or cooling, internet access, and a plan for moisture control.
Animal or agricultural use: Cleaning, drainage, ventilation, feed storage, fencing, and daily access may shape the site and layout more than the building itself.
It is also wise to plan for the next likely use. A structure that barely fits today’s belongings can become frustrating after one new mower, workbench, or set of shelves. Planning modest flexibility into the layout is usually more useful than filling every wall and floor area from day one.
Choose a Size Based on Clearances, Not Just Floor Area
Rather than selecting a standard size first, sketch the floor plan around the items and activities that matter. Mark the footprint of large equipment, shelves, worktables, and storage racks. Then add walking paths, door swings, and room to move bulky items in and out.
For example, a shed that stores a mower should allow for the mower, an open path to roll it through the door, and space to access items behind or beside it. A workshop should allow room to safely use tools and handle materials—not merely room to place the tools against a wall.
Questions to answer before selecting dimensions
What are the widest, tallest, and longest items that must enter the building?
Will doors need to accommodate a mower, tractor, ATV, trailer, or wheeled trash bin?
Will you carry long lumber, ladders, or equipment through the door?
Do you need shelves, overhead storage, wall hooks, a workbench, or a utility sink?
Will the outbuilding need space for future equipment or a change in use?
Door location deserves the same attention as building size. Double doors, overhead doors, sliding doors, and a standard service door each affect access, wall space, weather exposure, and the path leading to the structure.
Evaluate Placement From Every Direction
A convenient-looking backyard corner may not be the best site once drainage, grade, utility lines, maintenance access, setbacks, and future use are considered. Walk the property and assess more than one possible location before committing to a layout.
1. Confirm property and local constraints first
Requirements can vary by city, county, subdivision, zoning district, floodplain status, and the type or size of structure. Check with the applicable local building or planning authority before finalizing the site or purchasing a building. Ask about permits, setbacks, height limits, lot coverage, foundation expectations, utility work, drainage rules, and inspections.
If your property is subject to a homeowners association, review its architectural standards and approval process as well. Private deed restrictions may address building location, exterior materials, roof style, colors, visibility, or whether a detached structure is allowed at all. Treat approvals and permits as early planning tasks, not last-minute paperwork.
2. Study drainage and ground conditions
Water management should guide placement. Avoid locating an outbuilding where roof runoff, low spots, or neighboring drainage naturally collect water. Observe the yard after a heavy rain if possible. Look for standing water, erosion, soft ground, and areas where runoff travels toward the house or another structure.
The site should support the selected foundation and direct water away from the building. Depending on the project, site preparation may involve grading, compacted base material, a gravel pad, piers, or a slab. A larger building, a workshop, or a structure carrying heavy equipment may need a more substantial foundation plan. For projects that call for a slab, learn more about concrete work and slab installation before deciding how the site will be prepared.
3. Consider sun, wind, trees, and roof runoff
Orientation affects comfort and maintenance. Direct afternoon sun can make a workspace warmer, while shade and limited airflow can slow drying after rain. Mature trees may create falling-limb risks, leaf buildup, root conflicts, and limited access for construction equipment.
Also consider where roof runoff will land. The building should not discharge water toward the home, a neighbor’s property, a walkway, or a low area that already holds water. Gutters and drainage improvements may be appropriate, but they should be part of the plan rather than an afterthought.
4. Leave room to build and maintain it
The proposed footprint is not the full work area. Construction may require equipment access, material staging, excavation, concrete delivery, framing space, and a route for workers to move safely. After construction, you will still need to inspect siding, clean gutters, maintain the roof, and repair exterior finishes.
Mark the proposed structure corners with stakes, flags, or temporary lines. Then walk around the outline with doors “open” in your mind. This simple exercise often reveals a tight passage, a blocked gate, an awkward approach, or a conflict with an existing fence.
Plan a Practical Route From Driveway to Door
Access is one of the biggest differences between an outbuilding that works every day and one that becomes a storage inconvenience. Consider how people, equipment, and materials will reach it in dry weather, rain, darkness, and after routine yard growth.
Is there a stable path from the driveway, garage, or house?
Can a mower, wheelbarrow, garden cart, or hand truck reach the entry without crossing soft soil or tight turns?
Does the entry need a ramp, threshold transition, or wider landing area?
Will the access route remain clear if vehicles are parked, gates are closed, or landscaping matures?
Is exterior lighting needed for safe evening access?
Plan the approach based on what you will move most often. A narrow stepping-stone path may work for hand tools but not for a rolling mower or heavy materials. If the structure will serve as a workshop or equipment building, a durable approach and a door sized for real use are often worth prioritizing.
Decide on Utilities Before Site Work Begins
Adding power, water, drainage, or data service later can require reopening finished areas, trenching through new landscaping, or revising the original layout. You do not need to install every utility immediately, but you should decide what the building may need now and later.
| Potential feature | Planning questions |
|---|---|
| Electricity | Will you need lighting, outlets, a garage-door opener, tool circuits, refrigeration, charging, or climate-control equipment? |
| Water | Is a hose connection enough, or does the intended use call for a sink or wash-down capability? |
| Drainage | Will the use create water that needs a lawful, practical drainage solution? |
| Internet or data | Would a home office, studio, security camera, or smart equipment benefit from a wired or wireless connection? |
| Lighting and security | Where should exterior lights, interior fixtures, switches, locks, and cameras be placed for actual daily use? |
Before digging for footings, a pad, utility trenches, drainage, or posts, contact 811 and wait for the required utility-marking process. In Texas, Texas811 states that excavators must submit a locate request at least two business days before excavation, excluding weekends and holidays. Utility markings are essential, but privately owned lines may not be included, so discuss any known private water, electric, irrigation, propane, septic, or landscape lines with a qualified professional when applicable.
Electrical, plumbing, and structural work can carry code, safety, and permitting implications. Clarifying the project scope early makes it easier to determine where professional installation is appropriate. If the project includes a framed structure rather than a prefabricated shed, review the basics of professional framing work as you compare options.
Define the Foundation and Construction Scope
Not every outbuilding needs the same base or construction approach. A lightweight garden shed used for seasonal storage has different demands than a conditioned studio, a heavy-duty workshop, or a building that stores vehicles and equipment.
Write down what is included in the project so pricing and expectations are clear. A useful scope should identify the building, the site work, the finishes, and the work that remains outside the contractor’s scope.
Outbuilding scope checklist
Building dimensions, wall height, roof shape, and exterior materials
Foundation or pad type and site-preparation responsibilities
Grading, drainage features, and roof-water management
Door and window types, sizes, and locations
Framing, siding, roofing, insulation, and interior wall finishes
Electrical, plumbing, lighting, heating, cooling, and ventilation
Interior storage, work surfaces, flooring, and security features
Landscape restoration, fencing changes, gates, and access paths
Permit, inspection, and approval responsibilities
This detail is especially important when comparing estimates. Two proposals can describe the same-sized building while including very different amounts of site preparation, foundation work, utility connections, finish work, and cleanup. For a broader planning framework, see this home renovation checklist, then adapt it to the specific needs of your detached structure.
Set a Realistic Budget With a Contingency
The building itself is only one part of the cost. A complete budget should account for preparation, access, approvals, utility connections, and the features that make the space useful after it is built.
Site clearing, grading, base material, drainage, and erosion control
Foundation, slab, piers, anchors, or floor system
Delivery access and equipment needs
Doors, windows, roofing, siding, gutters, and exterior finishes
Electrical, plumbing, lighting, insulation, ventilation, and climate control
Shelving, workbenches, storage systems, ramps, and security hardware
Permit fees, inspections, HOA review, and survey or engineering needs when applicable
A contingency for unexpected site conditions or scope changes
Keep the must-haves separate from the nice-to-haves. It may be sensible to invest in the correct site preparation, foundation, door size, and electrical rough-in now while postponing finishes or storage accessories until later.
Final Outbuilding Planning Checklist
Before construction begins, confirm that you can answer each of these questions clearly:
What is the building’s primary use, and what future use should it accommodate?
What are the largest items that need to fit inside and move through the doors?
Does the proposed site avoid known drainage problems and provide room for construction and maintenance?
Have you checked applicable local requirements, property restrictions, and HOA standards?
Can people and equipment reach the building safely in all seasons and weather conditions?
Have you considered electricity, water, drainage, lighting, ventilation, and future utility needs?
Will you request utility locates before any excavation begins?
Does the written scope define site work, foundation, building materials, utilities, finishes, and exclusions?
Does the budget include the full project—not only the structure itself?
A well-planned outbuilding should fit the property, support the way you actually live or work, and remain practical as your needs change. If you are considering a custom structure, site preparation, concrete work, or a larger framing project in North Texas, contact H&H Construction to discuss your plans and project scope.
Contact us today and get started!